One thing I learned when working with more than one tool was that I could not assign multiple textures. When a texture is either created, or imported, it is assigned to all objects.
This annoyed me to the point where I thought either the program was flawed, or I was missing something big.
It turned out Zbrush only handles one texture at a time, this is true for version 3.2 and I think 3.5. If The new version 4 has made any changes to this I don´t know.
However, if you texture your objects in ZBrush by polypaint and ZApplink, the texture is fully visible and editable even with multiple tools!

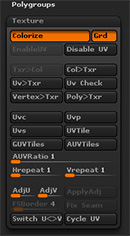
When you have UV:s assigned to your models, expand the Texture menu and click colorize.
This enables polypaint directly on the model and is what we need. If you turn it off you won´t see the texture, but it´s still there connected to the tool.
If you save the tool, the texture is saved with it and you can keep working on it untill you are ready to create a texture-map.
What you do then is simply to select the tool you want from the Subtool menu and paint away.
The reason I like this is because it becomes easier to try out ideas in a fast and friendly 3D-environment. Sure, you can do this in Maya or 3DS but I like this approach much better.
Once you are happy with the look of the textures it´s time to save them as a texturemap.
After that you have to work on the models separately, and perhaps move on to a different program.
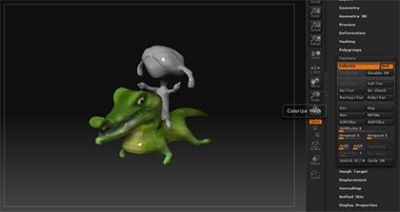
In the video you can see the benefits. I can modify and move the girl and place her on top of the alligator tail, all the while seeing the textures.

If I want to I can remove the texture from one tool and only keep the one I am working on. This way you can focus on just one Polypainting at a time if you want, and then turn on colorize for all and see the together.
I think it´s a great way to work with textures. I hope you can take something with you from this tutorial!
Gabriel